
So, you’ve decided to stop settling for that "meh" cup of joe and finally dive into the world of specialty coffee? Honestly, we couldn't be happier for you. It’s a journey that starts with a single sip and usually ends with a kitchen counter full of scales, gooseneck kettles, and several different types of glass brewers.
But before you get overwhelmed by the jargon and the gadgets, let’s take a breath. Brewing world-class coffee at home isn't about being a scientist (though a little precision helps); it’s about understanding a few core principles and having the right ingredients. At Limini Coffee, we believe that everyone deserves a spectacular morning ritual. Whether you are looking to buy your first bag of freshly roasted coffee beans or you're curious about why your French Press tastes a bit "muddy," this guide is for you.
What Exactly is "Specialty Coffee"?
You see the term everywhere, but what does it actually mean? In the industry, specialty coffee refers to green coffee beans that score 80 points or higher on a 100-point scale by the Specialty Coffee Association (SCA).
But for us, and for you at home, it means more than just a number. It represents a chain of care. From the farmer who meticulously harvests only the ripest cherries to the roaster (that’s us!) who coaxes out the unique flavors of the bean, every step matters. When you buy from a speciality coffee roaster, you aren't just buying caffeine; you’re buying a flavor profile: notes of jasmine, stone fruit, or perhaps a rich, velvety chocolate.
If you’re curious about where we get our beans, you can read all about sourcing our coffee to see the level of detail involved.
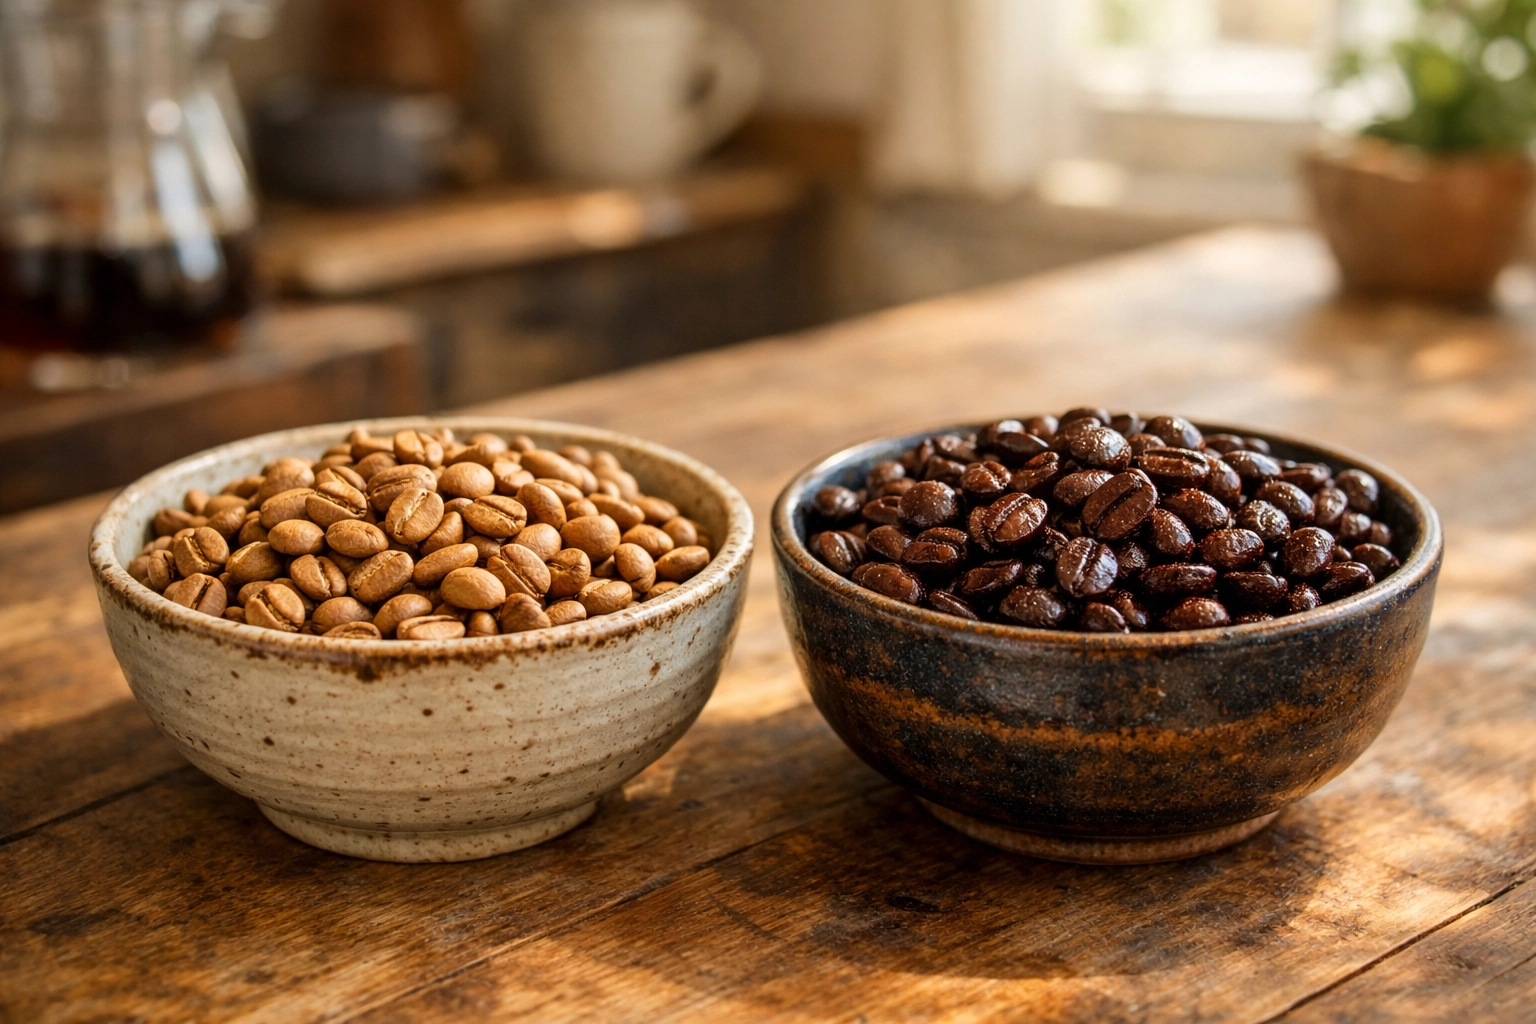
Step 1: It All Starts with the Beans
If you take only one thing away from this guide, let it be this: fresh is best. Period.
The pre-ground coffee you find on grocery store shelves has often been sitting there for months. By the time it hits your cup, the volatile oils that provide those beautiful aromas have long since dissipated. This is why we always recommend buying whole bean coffee and grinding it right before you brew.
Why Freshness Matters
Coffee is a fresh agricultural product. Once it’s roasted, it begins to "degas," releasing carbon dioxide. After a few weeks, it begins to oxidize and lose its sparkle. When you use freshly roasted beans from Limini, you’re getting the coffee at its absolute peak. We usually recommend using beans within 4 to 6 weeks of the roast date for the best experience.
Single Origin vs. Blends
As a beginner, you might wonder which to choose.
- Blends: These are designed for consistency and balance. They are often a bit more "forgiving" to brew.
- Single Origin: These beans come from one specific farm or region. They offer unique, distinct flavors that tell a story of the soil and climate (the terroir) where they grew.
Step 2: The Grinder is Your Best Friend
We’ll be honest here: your grinder is arguably more important than your coffee maker. We know, it sounds like a hot take, but it’s true.
The goal of grinding is to create uniform particles. If you have some pieces the size of boulders and others as fine as dust (which is what a blade grinder does), the water will extract flavor from them at different rates. The dust will over-extract (bitter!) and the boulders will under-extract (sour!). The result? A confusing, unpleasant cup.
Invest in a Burr Grinder
We always suggest a burr grinder. Unlike blades that chop coffee into uneven bits, burrs crush the beans into a consistent size. This allows you to control the extraction perfectly.
- Coarse: Looks like sea salt. Best for French Press.
- Medium: Looks like table salt or sand. Perfect for Pour-over.
- Fine: Looks like powdered sugar. Required for Espresso.
If you're still deciding on what gear to get, our guide on choosing espresso equipment covers the basics of high-quality gear.
Step 3: Don’t Ignore the Water
Imagine making a soup where 98% of the liquid is dirty tap water. It wouldn’t taste great, right? Coffee is about 98-99% water. If your tap water has a strong chlorine taste or is very "hard" (full of minerals), your coffee will suffer.
Temperature Control
You don't want boiling water. Boiling water (212 °F / 100 ºC) can "scorch" the grounds, leading to a harsh, bitter taste. On the flip side, water that’s too cool won't extract enough flavor, leaving your coffee tasting weak and thin.
The "Golden Zone" is generally 195–205 °F (90–94 ºC). If you don't have a temperature-controlled kettle, just bring your water to a boil and let it sit for about 30 to 60 seconds before pouring. This simple habit makes a massive difference.
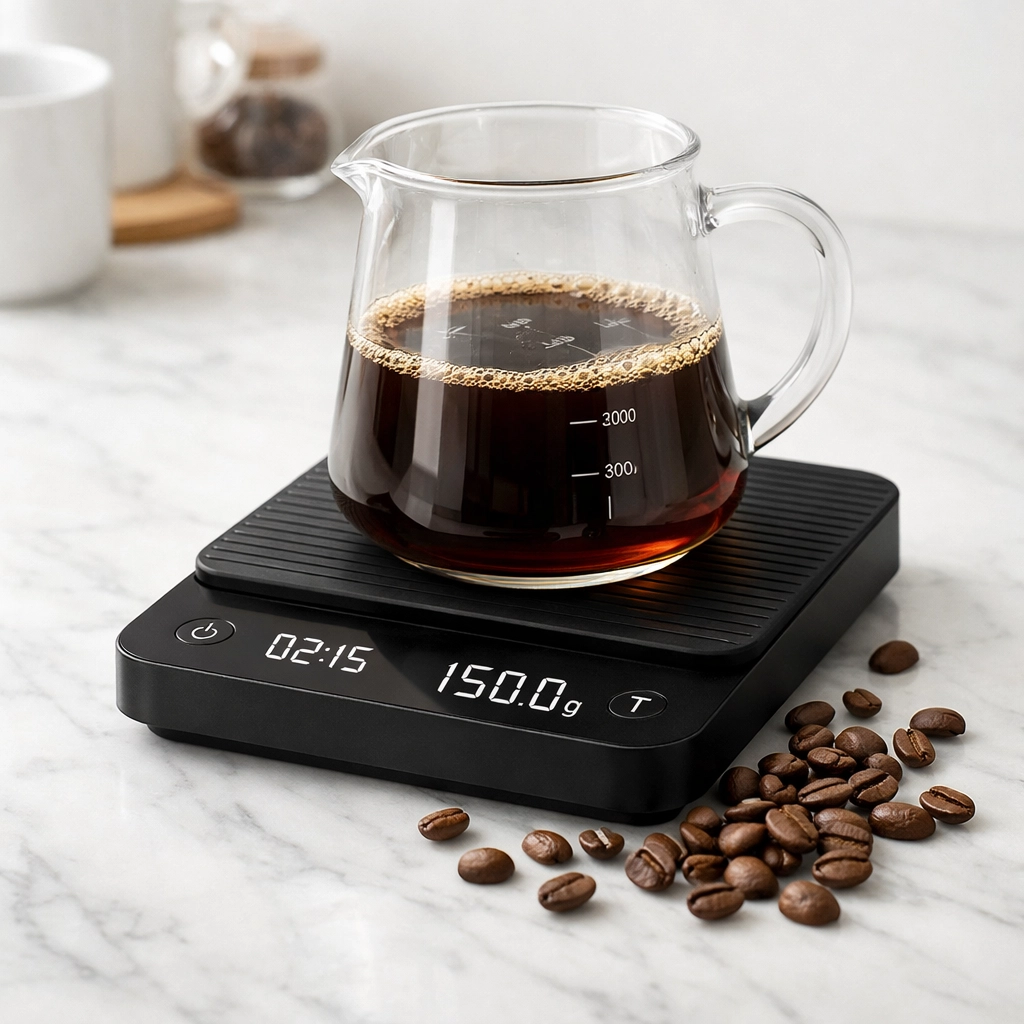
Step 4: The Golden Ratio
Consistency is the secret sauce of great baristas. If you’re just scooping coffee with a spoon and "eyeballing" the water, your coffee will be different every single day.
We recommend using a digital scale to weigh both your coffee and your water. A standard starting point: often called the "Golden Ratio": is 1:16. This means for every 1 gram of coffee, you use 16 grams of water.
Example Recipe:
- 30g of Limini Coffee beans
- 480g (or 480ml) of hot water
It’s a safe, delicious starting point. If you find it too strong, try 1:17. If it’s too weak, try 1:15. If you want to get really precise, check out our coffee brewing calculator.
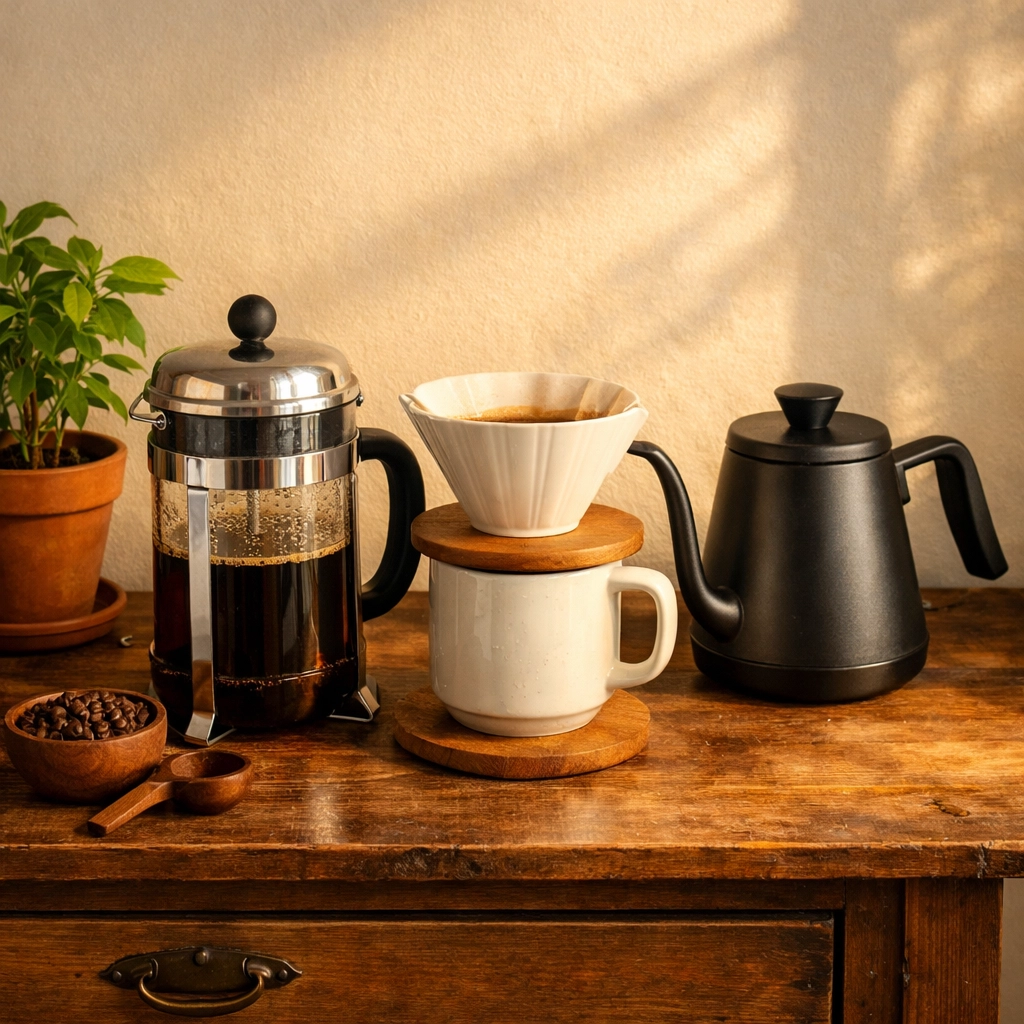
Step 5: Choosing Your Method
There are dozens of ways to brew, but for a beginner, we suggest starting with one of these three:
1. The French Press (Immersion)
This is the easiest way to get a heavy-bodied, rich cup of coffee. Because the grounds sit in the water for the whole duration (usually 4 minutes), it’s hard to mess up.
- The Drawback: It can be a bit "silty" or muddy.
- The Tip: After the 4 minutes are up, give the top a gentle stir, let it sit for another minute for the sediment to settle, then plunge slowly.
2. The Pour-Over (Percolation)
Think of the Hario V60 or Chemex. Water passes through a bed of coffee and a paper filter. This method produces a very "clean" cup that highlights the delicate, acidic notes of single origin coffees.
- The Challenge: It requires a steady hand and a gooseneck kettle for precision.
3. The AeroPress (The Wildcard)
The AeroPress is a fan favorite because it’s indestructible and incredibly versatile. You can make something close to an espresso or a clean drip-style coffee. It’s also the ultimate travel companion.
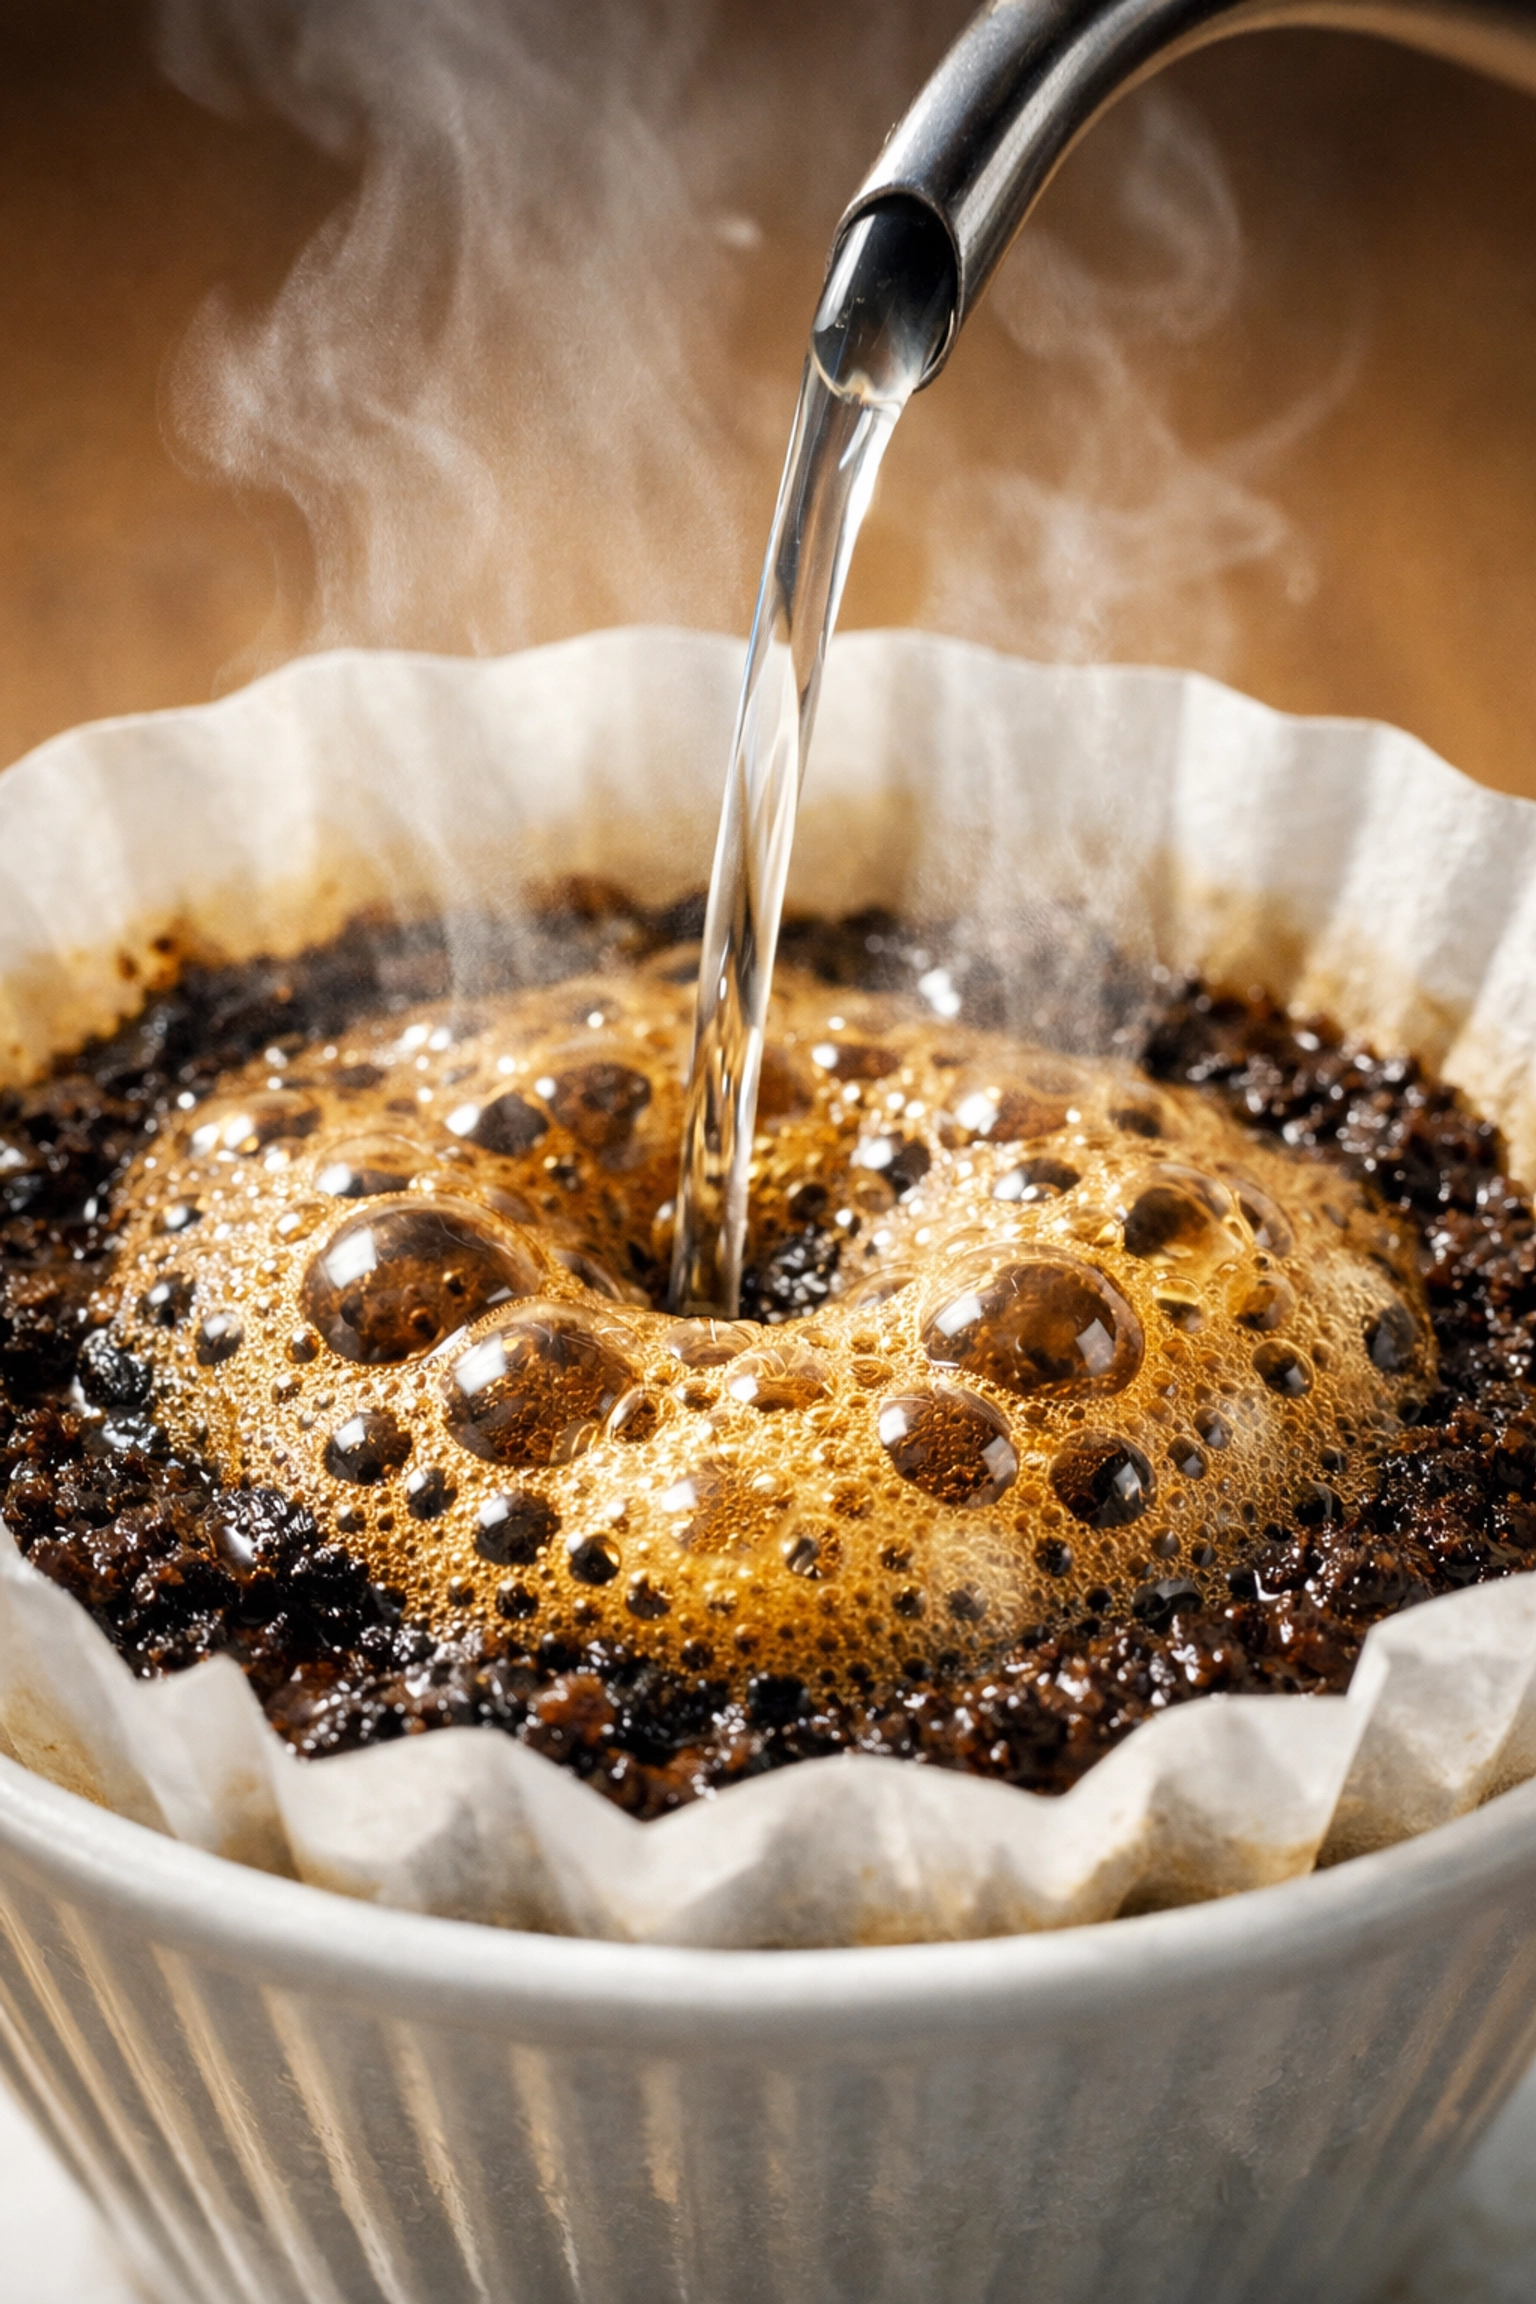
Step 6: The "Bloom" and Other Pro Habits
Once you have your gear and your beans, there are a few "pro" habits that will elevate your coffee from good to "wow."
The Bloom
When you first start pouring water over your fresh grounds, you'll see bubbles rising. This is the "bloom." It’s the carbon dioxide escaping the beans. We recommend pouring just enough water to wet the grounds (about double the weight of the coffee) and waiting 30 seconds. This allows the coffee to "settle" so the rest of the water can extract the flavor evenly.
Preheating Everything
Cold equipment steals heat from your brew. Always rinse your paper filter with hot water (this also removes any "paper" taste) and pour some hot water into your mug or carafe before you start. A warm vessel keeps those delicate flavors alive longer.
Keep It Clean
Coffee oils are delicious when fresh, but they go rancid quickly. Ensure your equipment is thoroughly cleaned after every use. There’s nothing worse than a fresh bag of premium beans being ruined by leftover residue from last week's brew.
Troubleshooting Your Brew
Is your coffee not tasting quite right? Don't worry, it happens to the best of us. Here’s a quick cheat sheet:
- Tastes Bitter? You’ve likely over-extracted. Try a coarser grind or a slightly lower water temperature.
- Tastes Sour or Weak? You’ve under-extracted. Try a finer grind or hotter water.
- Tastes "Flat"? Your beans might be past their prime, or your water quality is poor.
Remember, the "perfect" cup is the one you enjoy. Coffee is subjective! While we provide the guidelines, feel free to experiment. That is the beauty of coffee 🙂
If you find yourself getting really passionate about the craft, you might even consider some coffee barista training to truly master the art.
Ready to Start?
Brewing specialty coffee at home is a rewarding hobby that turns a caffeine fix into a moment of genuine craft. It’s about slowing down and appreciating the effort that went into that little bean.
The first step is always the beans. You can't brew great coffee with bad beans, no matter how expensive your equipment is. We invite you to explore our range of freshly roasted specialty coffees at Limini Coffee to find your new favorite roast.
So, go ahead: grab a bag, heat up your water, and let’s start brewing. If you have questions or want to share your first successful pour-over, we’d love to hear from you. Happy brewing!
Leave a Reply